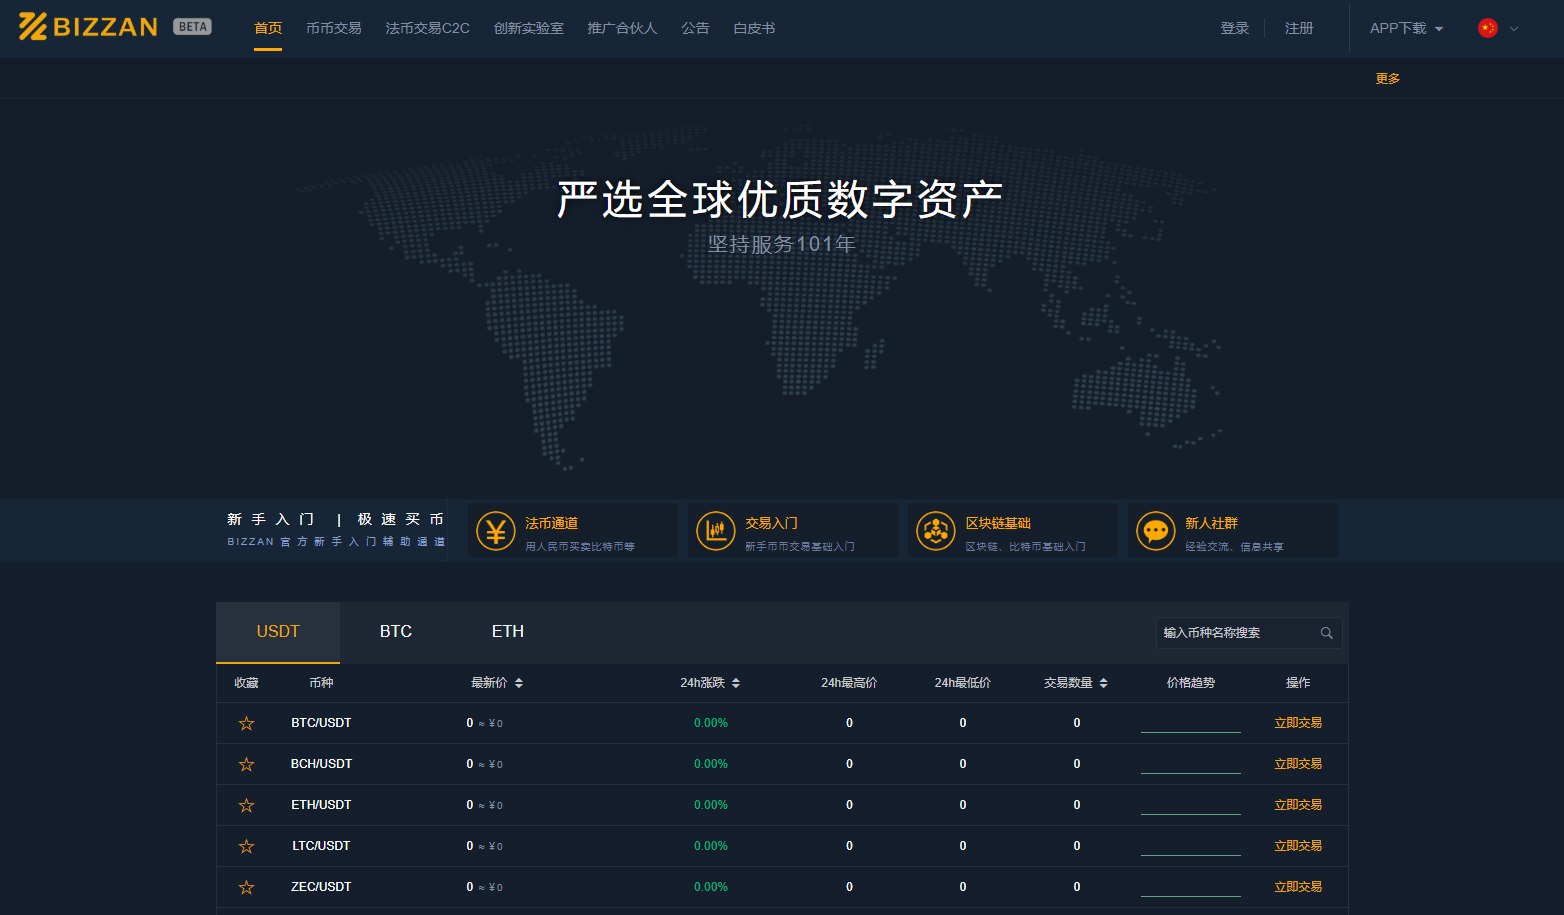
全网唯一开源核心代码的交易所 CoinExchange 实战部署教程
项目地址: github仓库
云服务器: 推荐服务器
基于 SpringCloud + Vue 的数字货币交易所,包含限价/市价撮合引擎、OTC 交易、C2C 交易、管理员后台等完整功能。

整体架构
逻辑架构
部署架构
依赖关系
目录
1. 环境要求
硬件
- CPU: 4 核+
- 内存: 8GB+ (推荐 16GB)
- 磁盘: 50GB+
软件版本
| 组件 |
版本 |
说明 |
| OS |
CentOS 7+ / Ubuntu 18.04+ / Windows WSL2 |
|
| JDK |
1.8 (8u202+) |
必须 JDK8,不支持更高版本 |
| Maven |
3.5+ |
|
| MySQL |
5.7+ |
推荐 5.7,8.0 也可 |
| Redis |
3.2+ |
|
| MongoDB |
4.0+ |
|
| Kafka |
2.2.1+ (需 Zookeeper) |
|
| Nginx |
1.12+ |
|
| Node.js |
10.x-14.x |
不推荐 v16+,本教程使用 v22 需做兼容处理 |
| npm |
6.x+ |
|
2. 基础环境安装
2.1 安装 JDK 8
1
2
3
4
5
6
7
|
sudo apt update
sudo apt install -y openjdk-8-jdk
java -version
sudo yum install -y java-1.8.0-openjdk-devel
|
2.2 安装 Maven
1
2
3
4
5
6
7
| sudo apt install -y maven
wget https://archive.apache.org/dist/maven/maven-3/3.6.3/binaries/apache-maven-3.6.3-bin.tar.gz
tar -zxvf apache-maven-3.6.3-bin.tar.gz -C /usr/local/
echo 'export PATH=/usr/local/apache-maven-3.6.3/bin:$PATH' >> ~/.bashrc
source ~/.bashrc
mvn -version
|
配置阿里云镜像加速 (~/.m2/settings.xml):
1
2
3
4
5
6
7
8
9
10
| <settings>
<mirrors>
<mirror>
<id>aliyun</id>
<mirrorOf>central</mirrorOf>
<name>Aliyun Maven</name>
<url>https://maven.aliyun.com/repository/public</url>
</mirror>
</mirrors>
</settings>
|
2.3 安装 MySQL 5.7
1
2
3
4
5
6
7
|
sudo apt install -y mysql-server-5.7
sudo systemctl start mysql
sudo systemctl enable mysql
sudo mysql -e "ALTER USER 'root'@'localhost' IDENTIFIED WITH mysql_native_password BY 'root123'; FLUSH PRIVILEGES;"
|
注意: 项目中所有配置文件的数据库密码默认为 root123,可根据需要修改。
2.4 安装 Redis
1
2
3
| sudo apt install -y redis-server
sudo systemctl start redis
sudo systemctl enable redis
|
2.5 安装 MongoDB
1
2
3
4
5
6
7
|
wget -qO - https://www.mongodb.org/static/pgp/server-4.0.asc | sudo apt-key add -
echo "deb [ arch=amd64 ] https://repo.mongodb.org/apt/ubuntu bionic/mongodb-org/4.0 multiverse" | sudo tee /etc/apt/sources.list.d/mongodb-org-4.0.list
sudo apt update
sudo apt install -y mongodb-org
sudo systemctl start mongod
sudo systemctl enable mongod
|
2.6 安装 Kafka + Zookeeper
1
2
3
4
5
6
7
8
9
10
11
12
13
|
wget https://archive.apache.org/dist/kafka/2.2.1/kafka_2.12-2.2.1.tgz
tar -zxvf kafka_2.12-2.2.1.tgz -C /usr/local/
cd /usr/local/kafka_2.12-2.2.1
bin/zookeeper-server-start.sh -daemon config/zookeeper.properties
bin/kafka-server-start.sh -daemon config/server.properties
bin/kafka-topics.sh --list --bootstrap-server localhost:9092
|
2.7 安装 Nginx
1
2
3
| sudo apt install -y nginx
sudo systemctl start nginx
sudo systemctl enable nginx
|
2.8 安装 Node.js
1
2
3
4
5
6
7
8
9
|
curl -o- https://raw.githubusercontent.com/nvm-sh/nvm/v0.39.0/install.sh | bash
source ~/.bashrc
nvm install 14
nvm use 14
node -v
npm -v
|
如果必须使用 Node.js v22+,需要注意:
sass 降级到 1.32.13sass-loader 配置中移除 implementation: require('sass') (避免 JSON 序列化丢失函数)- Vue 文件中的
/deep/ 替换为 ::v-deep
3. 数据库初始化
3.1 克隆项目
1
2
| git clone https://github.com/180129916/CoinExchange.git
cd CoinExchange
|
3.2 创建数据库
1
| CREATE DATABASE IF NOT EXISTS bizzan DEFAULT CHARACTER SET utf8mb4 COLLATE utf8mb4_unicode_ci;
|
数据库表由 JPA ddl-auto=update 在首次启动时自动创建,无需手动导入建表语句。
3.3 导入基础数据
1
| mysql -uroot -proot123 bizzan < 00_framework/sql/db_patch.sql
|
db_patch.sql 包含: 管理员菜单树、权限数据、初始管理员账号等。
3.4 默认管理员账号
4. 构建后端微服务
4.1 编译整个项目
1
2
3
4
5
6
| cd 00_framework
mvn clean install -pl core,exchange-core,otc-core -DskipTests
|
4.2 编译各微服务 JAR
1
2
3
4
5
6
7
8
9
10
11
12
13
14
|
mvn clean package -pl cloud -DskipTests
mvn clean package -pl exchange -DskipTests
mvn clean package -pl market -DskipTests
mvn clean package -pl ucenter-api -DskipTests
mvn clean package -pl admin -DskipTests
mvn clean package -pl wallet -DskipTests
mvn clean package -pl chat -DskipTests
mvn clean package -pl otc-api -DskipTests
mvn clean package -pl exchange-api -DskipTests
mvn clean package -pl bitrade-job -DskipTests
mvn clean package -DskipTests
|
编译产物在各模块的 target/ 目录下:
cloud/target/cloud.jarexchange/target/exchange.jarmarket/target/market.jarucenter-api/target/ucenter-api.jaradmin/target/admin-api.jarwallet/target/wallet.jarchat/target/chat.jarotc-api/target/otc-api.jarexchange-api/target/exchange-api.jarbitrade-job/target/job.jar
4.3 配置文件说明
各服务的配置文件在对应模块的 src/main/resources/{profile}/application.properties:
| 配置项 |
默认值 |
说明 |
spring.datasource.url |
jdbc:mysql://localhost:3306/bizzan |
MySQL 连接 |
spring.datasource.username |
root |
数据库用户名 |
spring.datasource.password |
root123 |
数据库密码 |
spring.redis.host |
localhost |
Redis 地址 |
spring.data.mongodb.uri |
mongodb://localhost:27017/bizzan |
MongoDB 连接 |
spring.kafka.bootstrap-servers |
localhost:9092 |
Kafka 地址 |
eureka.client.serviceUrl.defaultZone |
http://localhost:7000/eureka/ |
Eureka 注册中心 |
5. 启动后端服务
5.1 启动顺序
严格按照以下顺序启动,每个服务等待完全启动后再启动下一个:
1
2
3
4
5
6
7
8
9
10
| cloud (Eureka:7000)
→ exchange (撮合引擎:6005)
→ market (市场服务:6004)
→ ucenter-api (用户中心:6001)
→ admin (管理员API:6010)
→ wallet (钱包:6009)
→ chat (聊天:6008/6011)
→ otc-api (OTC:6006)
→ exchange-api (交易API:6003)
→ bitrade-job (定时任务:8001)
|
5.2 启动命令
1
2
3
4
5
6
7
8
9
10
11
12
13
14
15
16
17
18
19
20
21
22
23
24
25
26
27
28
29
30
31
32
33
34
35
36
37
38
39
40
41
42
43
44
45
|
JARS=/path/to/CoinExchange/00_framework
nohup java -jar -Xms256m -Xmx512m $JARS/cloud/target/cloud.jar > /root/logs/cloud.log 2>&1 &
sleep 30
nohup java -jar -Xms512m -Xmx1024m $JARS/exchange/target/exchange.jar > /root/logs/exchange.log 2>&1 &
sleep 60
nohup java -jar -Xms256m -Xmx512m $JARS/market/target/market.jar > /root/logs/market.log 2>&1 &
sleep 30
nohup java -jar -Xms256m -Xmx512m $JARS/ucenter-api/target/ucenter-api.jar > /root/logs/ucenter.log 2>&1 &
sleep 30
nohup java -jar -Xms256m -Xmx512m $JARS/admin/target/admin-api.jar > /root/logs/admin.log 2>&1 &
sleep 30
nohup java -jar -Xms256m -Xmx512m $JARS/wallet/target/wallet.jar > /root/logs/wallet.log 2>&1 &
sleep 20
nohup java -jar -Xms256m -Xmx512m $JARS/chat/target/chat.jar > /root/logs/chat.log 2>&1 &
sleep 20
nohup java -jar -Xms256m -Xmx512m $JARS/otc-api/target/otc-api.jar > /root/logs/otc.log 2>&1 &
sleep 20
nohup java -jar -Xms256m -Xmx512m $JARS/exchange-api/target/exchange-api.jar > /root/logs/exchange-api.log 2>&1 &
sleep 20
nohup java -jar -Xms256m -Xmx512m $JARS/bitrade-job/target/job.jar > /root/logs/job.log 2>&1 &
|
5.3 验证启动状态
1
2
3
4
5
6
7
8
|
curl http://localhost:7000/eureka/apps | grep -E '<name>|<status>UP|<status>DOWN'
tail -f /root/logs/*.log
netstat -tlnp | grep -E '7000|600[1359]|6010|8001'
|
期待输出: 所有服务状态均为 UP,各端口正常监听。
6. 构建前端
6.1 管理后台前端 (04_Web_Admin)
修改配置文件
编辑 04_Web_Admin/src/config/api.js:
1
2
3
4
| export default {
host: 'http://<你的服务器IP>:6010/admin',
}
|
编辑 04_Web_Admin/src/main.js (如有):
构建
1
2
3
4
5
6
7
| cd 04_Web_Admin
npm install
npm run build
|
构建产物在 dist/ 目录。
6.2 用户前端 (05_Web_Front)
修改配置文件
编辑 05_Web_Front/src/main.js:
1
2
3
|
Vue.prototype.rootHost = "http://<你的服务器IP>";
Vue.prototype.host = "http://<你的服务器IP>";
|
注意: host 必须设为 Nginx 网关地址(同一域名),不能直接写后端服务端口。前端通过 /uc/xxx、/exchange/xxx 等路径调用 API,由 Nginx 反向代理到各后端服务。
构建
1
2
3
4
5
6
7
8
9
10
| cd 05_Web_Front
npm install
npm install [email protected] --save-dev
npm run build
|
构建产物在 dist/ 目录。
Sass 兼容问题 (Node.js v16+)
使用 Node.js v16+ 或 Dart Sass 新版本时可能遇到以下问题:
问题 1: global 内置模块错误
1
| Deprecation Warning: The global Sass modules are not available for sass-loader
|
解决方案: 降级 sass 到 1.32.13
问题 2: Cannot read properties of undefined (reading 'bind')
此错误因 webpack 3 序列化 loader options 时丢失函数引用导致。编辑 build/utils.js:
1
2
3
4
5
6
|
sass: generateLoaders('sass', { indentedSyntax: true, implementation: require('sass') }),
scss: generateLoaders('sass', { implementation: require('sass') }),
sass: generateLoaders('sass', { indentedSyntax: true }),
scss: generateLoaders('sass'),
|
问题 3: /deep/ 选择器错误
Dart Sass 不支持 /deep/ 选择器。编辑 src/App.vue:
1
2
3
4
5
6
7
8
9
|
/deep/ .ivu-poptip-inner { ... }
/deep/ .ivu-poptip-popper .ivu-poptip-arrow { ... }
/deep/ .ivu-poptip-popper .ivu-poptip-arrow:after { ... }
::v-deep .ivu-poptip-inner { ... }
::v-deep .ivu-poptip-popper .ivu-poptip-arrow { ... }
::v-deep .ivu-poptip-popper .ivu-poptip-arrow:after { ... }
|
7. 配置 Nginx
7.1 部署前端静态文件
1
2
3
4
5
|
cp -r 04_Web_Admin/dist/* /usr/share/nginx/html/admin/
cp -r 05_Web_Front/dist/* /usr/share/nginx/html/
|
7.2 Nginx 配置
创建 /etc/nginx/sites-available/coinexchange (或直接在 nginx.conf 中配置):
1
2
3
4
5
6
7
8
9
10
11
12
13
14
15
16
17
18
19
20
21
22
23
24
25
26
27
28
29
30
31
32
33
34
35
36
37
38
39
40
41
42
43
44
45
46
47
48
49
50
51
52
53
54
55
56
57
58
59
60
61
62
63
64
65
66
67
68
69
70
71
72
73
74
75
76
77
78
79
80
81
82
83
84
85
86
87
88
89
90
91
92
93
94
95
96
97
98
99
100
101
102
103
104
105
106
107
108
|
server {
listen 80 default_server;
listen [::]:80 default_server;
server_name localhost;
root /usr/share/nginx/html;
index index.html;
location / {
try_files $uri $uri/ /index.html;
}
location /exchange/order/ {
proxy_pass http://localhost:6003;
proxy_set_header Host $host;
proxy_set_header X-Real-IP $remote_addr;
}
location /exchange/favor/ {
proxy_pass http://localhost:6003;
proxy_set_header Host $host;
proxy_set_header X-Real-IP $remote_addr;
}
location /exchange/exchange-coin/ {
proxy_pass http://localhost:6003;
proxy_set_header Host $host;
proxy_set_header X-Real-IP $remote_addr;
}
location /uc {
proxy_pass http://localhost:6001;
proxy_set_header Host $host;
proxy_set_header X-Real-IP $remote_addr;
}
location /market {
proxy_pass http://localhost:6004;
proxy_set_header Host $host;
proxy_set_header X-Real-IP $remote_addr;
}
location /admin {
proxy_pass http://localhost:6010;
proxy_set_header Host $host;
proxy_set_header X-Real-IP $remote_addr;
}
location /otc {
proxy_pass http://localhost:6006;
proxy_set_header Host $host;
proxy_set_header X-Real-IP $remote_addr;
}
location /chat {
proxy_pass http://localhost:6008;
proxy_set_header Host $host;
proxy_set_header Upgrade $http_upgrade;
proxy_set_header Connection "upgrade";
proxy_set_header X-Real-IP $remote_addr;
}
location /socket {
proxy_pass http://localhost:6004;
proxy_set_header Host $host;
proxy_set_header Upgrade $http_upgrade;
proxy_set_header Connection "upgrade";
proxy_set_header X-Real-IP $remote_addr;
}
location ~ /\. {
deny all;
}
}
server {
listen 8801;
listen [::]:8801;
server_name localhost;
location / {
root /usr/share/nginx/html/admin;
index index.html;
}
location /exchange/order/ {
proxy_pass http://localhost:6003;
proxy_set_header Host $host;
proxy_set_header X-Real-IP $remote_addr;
}
location /exchange/favor/ { ... }
location /exchange/exchange-coin/ { ... }
location /uc { ... }
location /market { ... }
location /admin { ... }
location /otc { ... }
location /chat { ... }
location /socket { ... }
}
|
重要: /exchange 不能直接全部代理到后端,否则 SPA 路由 /exchange、/exchange/BTC_USDT 会被后端 404。必须拆分为具体的 API 子路径 (/exchange/order/、/exchange/favor/、/exchange/exchange-coin/)。
7.3 加载配置
1
2
3
| sudo ln -sf /etc/nginx/sites-available/coinexchange /etc/nginx/sites-enabled/
sudo nginx -t
sudo nginx -s reload
|
8. 验证部署
8.1 访问地址
| 入口 |
地址 |
说明 |
| 用户前端 |
http://<服务器IP> |
首页、币币交易、OTC 等 |
| 币币交易 |
http://<服务器IP>/exchange |
交易页面 |
| 币币交易(指定币对) |
http://<服务器IP>/exchange/BTC_USDT |
指定交易对 |
| 管理员后台 |
http://<服务器IP>:8801 |
管理后台登录 |
8.2 验证 API
1
2
3
4
5
6
7
|
curl -s -o /dev/null -w "%{http_code}" http://localhost/exchange
curl -s -o /dev/null -w "%{http_code}" http://localhost/exchange/BTC_USDT
curl -s -o /dev/null -w "%{http_code}" http://localhost/exchange/order/current
curl -s -o /dev/null -w "%{http_code}" http://localhost/uc/ancillary/system/announcement
|
8.3 管理员登录
- 访问
http://<服务器IP>:8801
- 输入账号:
root / 密码: root123
- 正常应直接登录进入管理面板
如果遇到 SMS 验证码步骤,说明前端 login.vue 需要修改。编辑 04_Web_Admin/src/views/login.vue:
created() 钩子中清除 userPhone cookiehandle() 方法在 /check 成功后自动调用 signIn() 跳过 SMS 步骤
9. 常见问题
9.1 撮合引擎启动慢
首次启动时,exchange 服务需要从 MongoDB 加载历史订单数据,可能耗时 1-5 分钟。属于正常现象。
9.2 Eureka 注册失败
检查各服务配置中的 eureka.client.serviceUrl.defaultZone 是否指向正确的 Eureka 地址。
9.3 Redis 连接拒绝
检查 Redis 是否开启 notify-keyspace-events:
1
| redis-cli config set notify-keyspace-events Egx
|
或者在 redis.conf 中设置:
1
| notify-keyspace-events Egx
|
9.4 Kafka 连接问题
1
2
3
4
5
|
netstat -tlnp | grep 9092
/usr/local/kafka/bin/kafka-topics.sh --list --bootstrap-server localhost:9092
|
9.5 管理后台登录出现 SMS 验证
这是前端 login.vue 默认的两步登录流程。如果要跳过 SMS 验证,按以下方式修改:
文件: 04_Web_Admin/src/views/login.vue
1
2
3
4
5
6
7
|
Cookies.remove('userPhone');
this.signIn();
|
9.6 跨域问题
前端 API 请求出现跨域错误时:
- 确保
05_Web_Front/src/main.js 中的 host 与访问域名一致
- 使用 Nginx 反向代理,避免前端直接请求不同端口的后端
- 后端可通过
@CrossOrigin 注解或 Spring Security 配置允许跨域
9.7 JAR 包缺少 spark-core 依赖
如果运行 JAR 提示 spark.xxx.DB 类缺失,检查对应模块的 pom.xml 中 spring-boot-maven-plugin 是否包含 <includeSystemScope>true</includeSystemScope>:
1
2
3
4
5
6
7
| <plugin>
<groupId>org.springframework.boot</groupId>
<artifactId>spring-boot-maven-plugin</artifactId>
<configuration>
<includeSystemScope>true</includeSystemScope>
</configuration>
</plugin>
|
9.8 阿里云 OSS 配置
文件上传功能依赖阿里云 OSS,在 admin 模块的 application.properties 中配置:
1
2
3
4
| aliyun.access-key-id=你的AccessKeyId
aliyun.access-key-secret=你的AccessKeySecret
aliyun.oss.endpoint=oss-cn-shenzhen.aliyuncs.com
aliyun.oss.bucket=你的Bucket名称
|
附录: 各服务端口与说明
| 服务 |
端口 |
Context Path |
说明 |
| cloud (Eureka) |
7000 |
- |
服务注册中心 |
| exchange |
6005 |
- |
撮合引擎 (核心) |
| market |
6004 |
/market |
市场行情、K 线 |
| ucenter-api |
6001 |
/uc |
用户中心 |
| admin |
6010 |
/admin |
管理员 API |
| wallet |
6009 |
- |
钱包资产服务 |
| chat |
6008/6011 |
/chat |
OTC 聊天 |
| otc-api |
6006 |
/otc |
OTC 交易 API |
| exchange-api |
6003 |
/exchange |
币币交易 API |
| bitrade-job |
8001 |
/timejob |
定时任务 |
| Nginx (用户端) |
80 |
- |
用户前端入口 |
| Nginx (管理端) |
8801 |
- |
管理后台入口 |
| MySQL |
3306 |
- |
主数据库 |
| Redis |
6379 |
- |
缓存 |
| MongoDB |
27017 |
- |
订单详情 |
| Kafka |
9092 |
- |
消息队列 |
依赖关系图
1
2
3
4
5
6
7
8
9
10
11
12
13
14
15
16
17
18
19
20
21
22
| ┌─────────────┐ ┌──────────────┐ ┌──────────────┐
│ Nginx :80 │ │ Nginx :8801 │ │ Eureka :7000 │
│ (用户前端) │ │ (管理后台) │ │ (注册中心) │
└──────┬──────┘ └──────┬───────┘ └───────┬───────┘
│ │ │
▼ ▼ ▼
┌──────────────────────────────────────────────────────┐
│ API Gateways │
│ /uc → :6001 /exchange/* → :6003 /market → :6004 │
│ /admin → :6010 /otc → :6006 /chat → :6008 │
└──────────────────────────────────────────────────────┘
│ │ │ │
▼ ▼ ▼ ▼
┌──────┐ ┌────────┐ ┌───────┐ ┌────────┐
│Redis │ │ MySQL │ │MongoDB│ │ Kafka │
└──────┘ └────────┘ └───────┘ └───┬────┘
│
▼
┌────────┐
│exchange│
│撮合引擎 │
└────────┘
|
建议使用Agent部署: 在以下链接下载源码通过OpenCode 部署更省事
适用项目: github仓库
云服务器: 推荐服务器
技术支持: QQ: 1906692268